Showing posts with label kid approved food. Show all posts

10.30.2013

Super Easy Halloween Treats for the Kitcheny Challenged.

Last weekend, my sister hosted a Halloween party and I was tasked with bringing a snack. Not one to be outdone when it comes to all things Halloween, I came across the two ideas below and was instantly sold because A) there's almost no effort involved, and B) everyone loves pretzels and peanut butter. Except me. I don't really like peanut butter. But when it comes to a bunch of strangers, especially the kind who are mostly under the age of 11, who cares? Not me.

NUTTER BUTTER GHOSTS
&
WITCH FINGER PRETZELS


GHOSTS!

INGREDIENTS
Nutter Butter cookies
Wilton White chocolate Candy Melts
Mini chocolate chips


Melt your candy melts, paying VERY careful attention to the tempering instructions. One foul move and your melty heaven will turn into a smoking inferno of burnt, white chalk. Dip the Nutter Butters and top with chocolate chip eyes. I only had regular size chocolate chips and was not about to make a shopping trip for 48 dang mini chips.


FINGERS!

INGREDIENTS
Pretzel rods
Wilton Candy Melts (green)
Almond slivers


Melt your candy according to directions. Once all of the melts have a smooth runny consistency, they're ready to go. 


I transferred my melted candy into a long, narrow thermos so it would be easier to coat the sides of the pretzels. 


Dip and top with almond slivers.


Easy as heck and those pretzels are addicting.


Here are some highlights from the Halloween party:

The spread

This is Skinny Minney. 
I don't know if you can tell, but she's finally put some meat on those bones.
HEY-O!

She loves that joke.

Pumpkin Cuties with celery stem

Grape centipedes with bloody eyes

"Ugh! I feel like I have something in my eye... Will you take a look?"

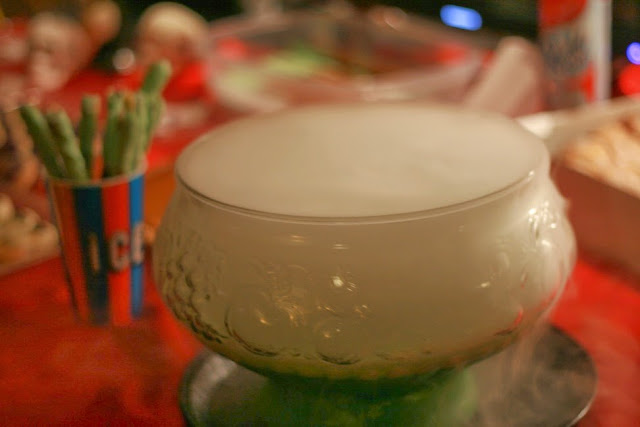
Witches Brew

Just in case you wanted some nightmare fuel, behold the decorations:

Koala-skull lamp, complete with flickering bulb

And straight from the pits of hell, these baby dolls were part of a collection of creepy toys in a blacked-out closet. Guests were invited to go into the closet with only a flashlight to protect their souls. 


Happy Halloween!


Read More

1.08.2013

Recipe: Taco Cups

I came across this recipe for Taco Cups on one of those "blog hops." You know the ones-  blog hosts a massive link up, which means you spend the next five hours hopping from blog to blog, pinning recipes/ crafts that you think you might do some day.

Tacos are a highly sought after staple in this house. The three of us love homemade tacos and we could easily have them several times a week. The downside: The greasy aftermath known as "the kitchen." So when I saw I could have crispy tacos without the oily mess, I was all over it.


TACO CUPS

INGREDIENTS
Ground Beef
Taco seasoning (I used garlic powder, onion powder, salt, and cumin)
Grated cheese
Corn
Salsa
Black beans
Tortillas
Non-stick spray
Note: These ingredients are just suggestions- add / omit to your liking.


DIRECTIONS
1. Heat oven to 350 F (176 C). Coat a muffin tin with non-stick spray.

2. Saute ground beef, with spices, until browned. Drain grease.

3. Add cheese, corn, salsa, and beans to the ground beef until it's reached a consistency you like.


4. Cut tortillas into squares. I winged it on the size, then used a good-sized one as a template for the rest.

5. Stuff one tortilla square into each muffin cup. If your tortillas aren't very pliable, stick them in the microwave for a few seconds, then squeeze into muffin tins while warm.

6. Fill each tortilla cup with ground beef mixture. Bake for approximately 20 minutes, or until the edges start to brown.


7. Top with whatever toppings you like- avocado, lettuce, tomato, hot sauce, sour cream, cheese, etc.


8. Eat!


Try these out the next time you feeling like eating Mexican and being healthy. Ha.

Boner'ppetite!


Read More

7.05.2012

Recipe: Oven Fried Chicken.

I bought a new cookbook.

It's this one.


The other night, Boyfriend and I decided to try out our first recipe.

This recipe was destined to go one of two completely different ways: Boyfriend loves fried chicken. I'm not really a fan.

Here are the details.

OVEN "FRIED" CHICKEN
According to Real Simple magazine

Ingredients:
-Canola oil for the rack
-1/2 teaspoon paprika
-Kosher salt and black pepper
-1 cup buttermilk
2 3/4 pounds bone-in chicken parts, skin removed
1 cup crushed buttery crackers, like Ritz


Directions:
1. Heat oven to 375. Oil wire rack and place it inside of a baking sheet.
2. In a shallow dish, combine paprika, buttermilk, and 1/2 teaspoon each of salt and pepper. Add chicken and turn to coat.
3. Place crackers in a shallow bowl. Remove chicken from buttermilk mixture and coat in crackers. Press gently to help stick the crackers.
4. Place chicken on wire rack and bake until crispy (or until thermometer reads 160F for white meat and 165F for dark meat). Make sure to turn chicken halfway through the cooking process, at roughly 20 minutes.


Notes:
-For the wire rack, we used olive oil.
-We don't have kosher salt. We used cheap-ass Morton.
-I let the chicken sit in the buttermilk for about 20 minutes because I've heard all the fancy chefs on TV say that the enzymes in buttermilk are good for breaking down the meat.
-I only like chicken breasts. So that's what we used. Before beginning any of the recipe, I placed them in a Ziploc freezer bag and beat the shit out of them with a rolling pin. That way, they'd be nice and tender. Then, I cut each breast into 2-3 strips. Because I like chicken strips.
-We used grocery store brand "butter crackers". I wasn't disappointed.
-Since we used "tenderized" breasts, we also only cooked it for approximately 35 minutes total.


Review:
This chicken never got "golden" or "fried" looking like the picture in the magazine. And it didn't really TASTE like fried chicken either. With that said, this chicken was really good. The meat was juicy and tender. The coating really was rich and buttery. And if there's one thing I like, it's RichAndButtery. It reminded me of something I would have eaten when I was little. Like, if I lived in the south or something. Because they eat a lot of fried chicken in the south, right? Anyway, it was definitely a kid-friendly meal, that's for sure.

Serving up this plate of belly-filling goodness made me feel like a real life June Cleaver. It seems really wholesome and familyish. The leftovers were even good the next day. I think next time, I might try adding more paprika to the buttermilk and salt/ pepper to the crushed crackers.

This recipe was easy to make and yielded a filling result. Make this on Friday night and you'll have a great snack to take to the beach on Saturday.

Boner'ppetite!

Read More

11.20.2011

White Bean and Sausage Rigatoni.

I'm pretty sure I don't even need to say "I found this wonderful recipe in my FAVORITE magazine, Anyone Can Cook" because just about everything I make comes from there.

So.

I found this wonderful recipe in my favorite magazine, Anyone Can Cook.

It's for baked pasta.

And if there's one thing I like to do, it's eat the shit out of some pasta.

WHITE BEAN AND SAUSAGE RIGATONI

INGREDIENTS:

-6 cups (or one box) dried rigatoni
-8 oz. cooked kielbasa
-1/2 of a 6 oz. can Italian-style tomato paste
-1/4 cup dry red wine or reduced-sodium chicken broth
-2 10 oz. packages frozen chopped spinach, thawed and well-drained
-2 14.5 oz. cans diced tomatoes with basil, oregano, and garlic, undrained
1 15 oz. can Great Northern beans, rinsed and drained
1/3 cup grated or finely shredded Parmesan cheese


Preheat oven to 375F. Cook rigatoni according to package. Drain and transfer to a large bowl.


Cut kielbasa in half lengthwise, then cut into bite size pieces. In a small bowl, combine tomato paste and chicken broth.


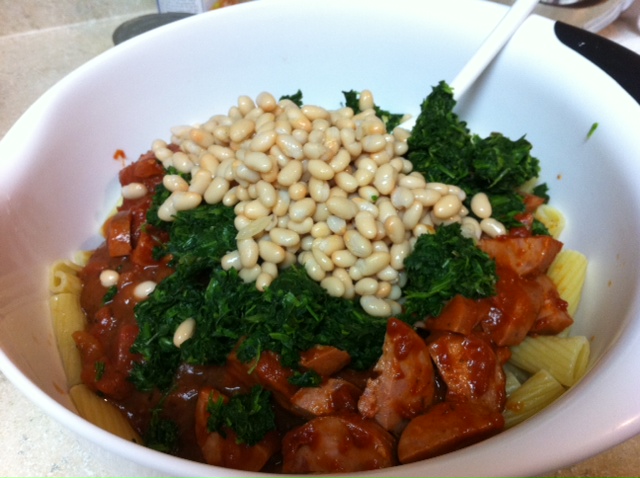
Add kielbasa, tomato paste mixture, spinach, tomatoes, and beans to the rigatoni; stir to combine. Transfer to an ungreased 3-quart rectangular baking dish.


Bake, covered, about 25 minutes or until heated through. Uncover; sprinkle with Parmesan. Bake, uncovered, about 5 minutes or until cheese melts. Makes 6 to 8 servings.


NOTES:
-I used chicken broth instead of red wine.
-20 oz of spinach is way too much, IMO. Next time I think I would take it down to 10-12 oz.
-I couldn't find Great Northern beans at my grocery store. I went with standard "White Beans" and I loved it. Boyfriend wasn't so crazy about the beans in general, but I think it was actually my favorite part.
-Add as much Parmesan as you want. It's impossible to have too much. Also, only used fresh. It's way better than the dusty canned stuff.

This is a pretty hearty meal and it's simple to make. Perfect for rainy days or a quick family dinner.

Boner'ppetite.
Read More

6.28.2011

Make a Hot Dog, Dummy.

Are you starving?
Yes!

Want something easy and fast because if it takes longer than 5 minutes to make you'll probably roid rage out and flip a table over?
Yes!!

Want to avoid going to the store because you have Charlie Manson hair and you're still in your pajamas even though it's 2:48pm, and also because Judge Judy is about to start in 12 minutes?
YeSsSsSs!!!

Well. Make a hot dog, dummy.

INGREDIENTS
-weenie
-bun
-Heinz baked beans
-cheddar cheese

DIRECTIONS
Heat weenie. Heat beans. Put it all together.

Boner'ppetite.


Read More

6.10.2011

Mac N Cheese.

Has anyone purchased the Anyone Can Cook magazine yet??? I'm STILL enjoying meals from that one first magazine I bought and let me tell you, I have yet to be let down. For the most part, their recipes are pretty easy to follow. And more importantly, none of them require obscure-ass rare spices that I'd have to fly to Ho Chi Minh City to find.

My latest trial and error: Mac N Cheese.

Ingredients:
1 1/3 cups dried elbow macaroni
3/4 cup milk
2 tbsp butter
1/4 teaspoon ground white pepper
1/8 teaspoon salt
4 oz American cheese, cut into half inch cubes
1 cup shredded sharp cheddar cheese
1/4 cup shredded mozzarella cheese


Directions:
Preheat oven to 350. Cook pasta according to package. Drain and return to pan. Add milk, butter, pepper, and salt. Stir in all the cheeses till melty. Transfer to a greased 1 1/2 quart casserole. Bake uncovered for 15 minutes; stir gently. Bake for another 5 minutes or until it's heated through (don't overheat or mixture will curdle (barf.)). Let stand for 10 minutes.


NOTES:
-I used black pepper because I didn't want to spend money on white pepper and never use it again.
-I also used Kraft American singles because I didn't want to spend $6 on a block of American cheese when I already had slices at home. I used 7 slices and ripped them up into pieces before adding to the mixture.
-AND, I also topped my mac with some Italian bread crumbs before putting it in the oven. I like my mac crunchy. (It didn't get crunchy.) (But it was still good.)
-I served it up right away (instead of waiting 10 minutes). I liked it that way.

IMPORTANT: While I would still make this recipe again because it was easy and tasty, this is not a smooth, creamy, gooey Mac N Cheese. It's more like a lumpy, ricotta type, homestyle Mac N Cheese. It also reheats fine the next day.

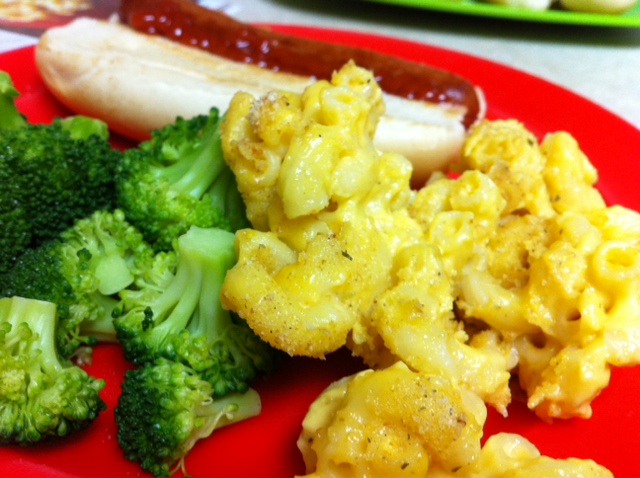
Eat it with a hot dog.

Boner'Ppetite.


Read More

6.06.2011

Ladies Who Lunch.

Last week, my blogger-and-real-life friend Crying is the New Croquet decided to host a Ladies Who Lunch. And since we all know I like to eat, and in some parts of the world I might be considered a lady, I was all over it.

On the Menu:
Bruschetta
Black Bean and Corn Salad
Chef's Salad

For the Kids:
Dino-Bites
Pizza Roll-ups

I'm sure you'll be shocked to know I was too busy strapping on the old feedbag to get recipes for everything. But I did manage to get the deets on my two favs, the Corn and Bean Salad and the Pizza Roll-ups.

Black Bean and Corn Salad
1 can of black beans.
1.5 cups frozen sweet organic corn.
2 scallions chopped
2 cloves of garlic (crushed through a press)
1 tomato diced
Olive oil (about a tbsp or less if you want it lighter)
Lime juice
Salt

Rinse beans. Combine all ingredients. Let it sit and mingle for a few hours. (Can also be served wrap style with Bibb lettuce.) (I ate it with a shit ton of tortills chips.)

I couldn't stop eating all her beans and corns.

Worth Noting: Word on the street is, this is a Weight Watchers recipe. Which is shocking because it was fucking delicious and usually I only like stuff when it's one Weight Watcher's "EAT THIS AND DIE" list.

Pizza Roll-ups
Pillsbury pizza dough
Sauce
Cheese
Pepperoni
and any other toppings you might like

Flatten out pizza dough. Prepare with toppings as usual. Roll up into a log. Slice into generous 1 inch thick rounds. Fit rounds side by side in a round pie dish. Bake according to dough instructions or until tops brown.


Here are some other shots of the stuff I ate.

Every lunch should have Mimosas. Whether you're on the clock or not is irrelevant.

Bruschetta vs. TILTE. (Spoiler Alert: I won.)

A salad topped with potatoes, avocado, and chicken (among other things) is MY kind of salad.

More pizza roll-ups.

Bailey, the Wonder Weiner/ Butler. He sat on his butt like this the whole time we were at the table.

Boner'Ppetite.
Read More

© Things I Like to Eat (...and Other Nonsense), AllRightsReserved.

Designed by ScreenWritersArena