Showing posts with label recipe. Show all posts

2.13.2014

Recipe: Raspberry Coconut Layer Bars

The other day, I walked by the kitchen at work and saw these raspberry beauties out on the counter, just begging me to eat them. Not wanting everyone at work to know how well I can tie on the old feedbag, I looked disinterested and nonchalantly grabbed one on my way to my desk, like "Oh hey. What's this. Sure, I'll take one. I guess."


It was the so freaking good, it took everything in me to not go back and eat the whole plate.

After casually inhaling two more, I complimented my coworker Jill on her handywork and basically begged for the recipe.

Hopefully, it's not a secret family treasure because I'm totally sharing it right now with the whole, wide world (and by world, I really just mean my mom and two friends in Casper, WY).


Raspberry Coconut Layer Bars

Ingredients

1 2/3 graham cracker crumbs
1 stick melted butter
7 oz sweetened flaked coconut
14 oz can sweetened condensed milk
1 cup raspberry jam (roughly 3/4 of the jar, if you don't feel like measuring)
1/2 cup chopped, toasted walnuts

Directions

Preheat oven to 350.

1. Mix together graham cracker crumbs and butter. Press into a compact crust in a 9x13 baking dish.


2. Spread coconut evenly over crust.


3. Pour condensed milk evenly over coconut.


4. Bake for 20-25 minutes, or until the edges turn golden.


5. Let cool, then evenly spread jam over everything. (It will seem like there's not enough, but there is.)


6. Chill 3 - 4 hours. Top with toasted walnuts; you may want to use more than 1/2 cup. As you can see in the photos, it's on the sparse side.


7. Cut into squares/ rectangles and serve!


I made these for our Super Bowl party and they were a fucking hit. Not to mention, they were super easy to make. Anything that's easy to throw together and makes me look like I know what I'm doing in the kitchen gets a thumbs up in my book. Five chins all around!


Read More

9.30.2013

Breaking Bad Party.

Since Eric loves the AMC series Breaking Bad, we decided to have a party and serve a themed menu in honor of the finale episode.

Note: Any time we have anyone over who doesn't actually live in this house, we consider it a party.

Now, I'm not really into this show because I've never actually seen more than five minutes of an episode because the one part that I saw involved Tuco beating the living shit out of that one other dude in the desert and I instantly burst into tears because I felt sorry for the poor dead guy and ran out of the room, screaming "I HATE THIS SHOW!!!!!!" So, as you can tell, I was really into the final outcome.

Staying true to BB, we served the following foods:
  • Table-side guacamole
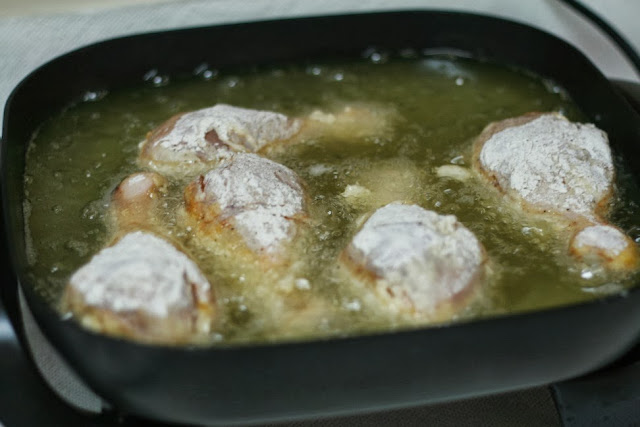
  • Fried chicken
  • Green beans
  • Mac N Cheese
Now, you die-hard fans may be seeing "Wtf, there was no mac n cheese in BB," to which I say so what, it's good.


This was the first time Eric and I had ever made fried chicken and while we were nervous, we decided to play it cool by only spending the past 48 straight hours preparing for it.

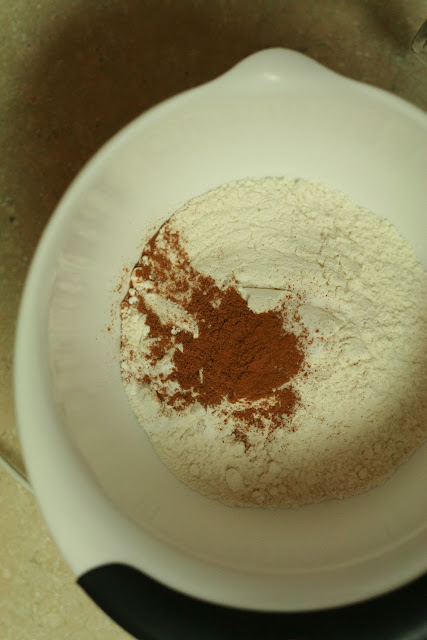
We followed this recipe from bon appetit magazine and were VERY happy with the results: flavorful, moist chicken with a mildly seasoned, deep-fried coating straight from the crunch gods. For reals, that ish was good.

Here's how it went down:

Mise en place

Step one

Step two

Step three

Step four

Appetizer 

Green beans (coincidentally from Albertson's, but not really)

Walter White Mac N Cheese

The blue rock candy I mean CrYsTaL MeTh

Acting professional

Biscuit before she tried drugs

Biscuit after dog meth

BB Party


If you like fried chicken, I strongly suggest you try the recipe above. Although it took some time, it was pretty straight forward and definitely worth it. Regardless of which recipe you use, just make sure to cover all of your cooking surfaces with paper towels, otherwise they'll end up greasy like my chin after a long day at work.


Read More

6.19.2013

Peanut Butter Cookies.

Last month, we celebrated my nephew's birthday. It was a potluck of sorts and I was in charge of the dessert. Since he doesn't like cake, but does like cookies, I went with snickerdoodles and peanut butter.


Unfortunately, I didn't get an "after" shot because I was running late and cookies don't last long enough to even cool off around these parts. I will confess that they came out a little flat for my liking, but that didn't stop partygoers from pigging out. Seriously, I think everyone commented on how good they were. I even tried a cookie myself, you know, just to test the merchandise, and I have to admit, they were gooood. Soft and buttery and not too peanutty. They were a fucking hit.

These cookies are super easy to make and only require a few ingredients. Try it out the next time you have friends over. -Or the next time you feel like secretly binging out on three dozen cookies while your significant other is at the Home Depot.


Read More

9.26.2012

Recipe: Butterscotch and Chocolate Chip Oatmeal Cookies

Last Friday, I decided to make some cookies to take to Boyfriend's office. I had been wanting to use up the remainder of some butterscotch and chocolate chips that were sitting in the cupboard and this seemed like the perfect excuse.

I remembered my friend Danielle mentioning something called an Oatmeal Scotchie and I thought that might be a good way to use up the chips. After a quick Google search, I decided to go with this recipe from VeryBestBaking.com.

Unfortunately, I didn't exactly have a ton of butterscotch or chocolate left, so they came out a little sparse in the chip department. And they also seemed a *tad* dry. But these issues could totally be user errors. It's been known to happen.


Anyway, they were still totally edible. And great for a "Round #2" dessert. (You'll see at the end...)


OATMEAL SCOTCHIES

INGREDIENTS
1 1/4 cups all-purpose flour
1 tsp. baking soda
1/2 tsp. salt
1/2 tsp. cinnamon
1 cup (2 sticks) butter, softened
3/4 cup granulated sugar
3/4 cup packed brown sugar
2 large eggs
1 tsp. vanilla
3 cups quick or old-fashioned oats
1 2/3 cups butterscotch chips


DIRECTIONS
1. Preheat oven to 375F (190C).

2. In a small bowl, combine flour, baking soda, salt, and cinnamon.


3. In a large bowl, beat butter, sugars, eggs, and vanilla. Gradually add flour mixture.


Stir in oats and chips. Drop by rounded tablespoon onto ungreased baking sheets.


Note: I always use parchment lined baking sheets. I've read they prevent cookies from flattening out and sticking. Also, if you have Silpat, use those. Word on the street is, they are "the bomb."

4. Bake for 7 to 8 minutes for chewy cookies, or 9 to 10 minutes for crisp cookies. Cool on baking sheets for 2 minutes. Remove to wire racks to cool completely.


Remember the Round #2 dessert? 

Here it is, in all its glory...

Ice Cream Sandwiches.


Boner'ppetite!

Read More

9.24.2012

Recipe: Turkey and Bacon Turnovers

These turnovers make the perfect dinner for football night. They're kind of like pub food because they're heavy and hearty, but the flakiness of the puff pastry makes them seem much more civilized.


TURKEY & BACON TURNOVERS
Found in Cuisine Fast & Fresh magazine (Fall 2012)

INGREDIENTS
4 strips thick-sliced bacon
1 sheet frozen puff pasty, slightly thawed
4 tsp. Dijon mustard
8 oz. deli-sliced turkey breast
4 slices Cheddar cheese
1 egg, blended

DIRECTIONS
1. Preheat oven to 400F (204C). Line a baking sheet with parchment paper.

2. Cook bacon in a skillet until it's reached desired crispiness. I don't like my bacon too crunchy, and I thought it might continue to cook a bit more when placed in the oven, so I went slightly under. When it's done cooking, transfer to a paper-towel-lined plate.


3. Flour a smooth working surface. Roll puff pastry out into an 11-inch square on the floured surface. Use a pizza slicer to divide into four even squares. Spread with 1 tsp. Dijon (or more if you like). I just eyeballed it.


4. Arrange turkey, bacon, and cheese on half of each pastry square.


5. Brush edges of each square with the egg wash, and fold in half so each square is now a triangle. Gently press the tines of a fork all along the open edges to seal shut. In order to make everything fit, you may have to move your filling around.

Note: When I did this step, I accidentally poked a few holes through my pastry. If this happens to you, gently pinch the holes to stick them back together.


6. Brush the tops of the triangles with more egg wash and bake until golden and crisp, approximately 25 minutes.


These turnovers can easily be great for both adults and children. If your kids don't like an ingredient, just omit or substitute. Maybe use ham or roast beef instead of the other meats. 

Made according to the recipe, they can be a little on the salty side (probably because I packed mine with bacon), so if at all possible, I would not omit the Dijon mustard. It acts as a tangy balance to the saltiness of the meats.

I served these handheld-treats with an heirloom tomato salad from The Barefoot Contessa. It seemed like a good idea for "healthy'ing" the meal up. Unfortunately, it got four thumbs down in this house and we will not be making that salad again. 

Whether you're hosting a sporting event, going to the beach for the day, or packing a picnic, these turnovers are perfect because they're self-contained and don't require any silverware.

Boner'ppetite!

Read More

9.11.2012

Recipe: Best Enchiladas Suizas.

Growing up in southern California, I've had my fair share of enchiladas. My mouth had come to know and love the sight of that rolled up corn tortilla, stuffed with cheese and onion, and drenched in red sauce. Sure, the raw onions gave me heartburn, but that's the price you pay for good food, right?

It wasn't until I was in high school when I first saw a green chile enchilada. I was at my friend Melody's house and her mom asked if I wanted some enchiladas. She pulled out a baking dish that was stacked high with casserole-style enchiladas. IN GREEN SAUCE. 

This was not something I was prepared for.

Not wanting to be rude- and also because I was hungry- I said I would like some.

Long story short: They were delicious.

And completely different from what I'd always known as "enchiladas."


Flash forward many years. I was at lunch with a couple of girlfriends. My friend Chrystal ordered something called Enchiladas Suizas. She was raving about how good they are and how she always orders them at that particular restaurant.

When the plate arrived, it was like Melody's mom's enchiladas all over again. 

Green sauce.

Again, delicious.


______________________________________________


This past Friday, while sitting at the computer, I was trying to figure out what to make for dinner. I knew I wanted to use chicken breasts, but wasn't sure what to do with them. I spent some time Googling recipes and looking at Pinterest images. Nothing was catching my eye.

Then I thought about those green enchiladas.

After some researching, I settled on two recipes that I wanted to combine for one super ultimo enchilada.

Here are the recipes I used:

Chicken Enchiladas with Creamy Green Sauce
Enchiladas Suizas

And here's what I came up with...


TILTE'S BEST ENCHILADAS SUIZAS EVER 


INGREDIENTS
2 skinless chicken breasts
Olive oil
Pepper
Garlic salt
5 garlic cloves, unpeeled
12 corn tortillas
24 oz. green chile enchilada sauce
1/2 cup (or a little more) heavy cream
6 oz. grated Monterey Jack cheese
Crumbled Cotija cheese, to taste
Vegetable or canola oil for frying
9x9 baking dish


DIRECTIONS
1. Heat oven to 400 Fahrenheit (204 Celsius).

2. Place chicken into a baking dish and baste with olive oil. Sprinkle with pepper and garlic salt to taste. Add garlic cloves to the dish and bake until chicken juices run clear, approximately 20-30 minutes (depending on the oven). When the chicken is done, set aside to cool.

3. In a large bowl, combine heavy cream and enchilada sauce. We used Frontera Green Chile Enchilada Sauce with Roasted Tomatillo and Garlic. I'm sure any green chile sauce would work just fine, but if you can find the Frontera stuff, I'd strongly suggest using it. I found this one at my local grocer (Vons) in the "Mexican food" aisle.

4. Once the chicken has cooled, shred to your preferred consistency. I like mine pulverized. 

5. Use a large knife to flatten garlic cloves, squeezing the insides out. Discard peels.

6. In a medium sized bowl, combine shredded chicken, baked garlic, and 1/3 of the enchilada sauce. This will be your enchilada stuffing. Set aside.


7. In a small frying pan, heat oil. There should be enough oil to fully submerge a tortilla. One tortilla at a time, flash fry for about 5-10 seconds. You want them to be in long enough to become soft and pliable. If it starts to get crispy, toss and start over. As each one is complete, set aside on a paper towel.

Important: Make sure the oil is fully heated before you start frying- if it's not, your tortilla will just soak it up and turn into a grease pit.

8. Once the tortilla has cooled enough to handle, dredge in enchilada sauce and place on a "working station". This area will get messy. Add a small amount, roughly 2 tablespoons, of chicken mixture to the sauced tortilla. Top with a light sprinkling of Monterey Jack cheese.  Roll up tightly and place, seam down, onto your baking dish. 


When the first layer of enchiladas is done, top with half of the remaining enchilada sauce, Monterey Jack, and Cotija. 

Repeat steps 7 and 8 until done. Top with remainder sauce and cheese.


9. Bake at 350 Fahrenheit (177 Celsius) until heated through and cheese is melted, roughly 30 minutes. Makes 12 enchiladas.

Dinner is served!


Since we were eager and starving, we didn't do any fancy plating. But if you're looking to razzle dazzle your guests, combine sour cream with a little water and whisk. This thins it out, similar to Salsa Crema. Drizzle over each serving and top with a handful of chopped tomato.


I'd LOVE if you tried this recipe yourself and let me know what you think! Please feel free to post in the comments or email me at TILTE at live dot com.

Boner'ppetite!

Read More

© Things I Like to Eat (...and Other Nonsense), AllRightsReserved.

Designed by ScreenWritersArena