Showing posts with label dessert. Show all posts

2.13.2014

Recipe: Raspberry Coconut Layer Bars

The other day, I walked by the kitchen at work and saw these raspberry beauties out on the counter, just begging me to eat them. Not wanting everyone at work to know how well I can tie on the old feedbag, I looked disinterested and nonchalantly grabbed one on my way to my desk, like "Oh hey. What's this. Sure, I'll take one. I guess."


It was the so freaking good, it took everything in me to not go back and eat the whole plate.

After casually inhaling two more, I complimented my coworker Jill on her handywork and basically begged for the recipe.

Hopefully, it's not a secret family treasure because I'm totally sharing it right now with the whole, wide world (and by world, I really just mean my mom and two friends in Casper, WY).


Raspberry Coconut Layer Bars

Ingredients

1 2/3 graham cracker crumbs
1 stick melted butter
7 oz sweetened flaked coconut
14 oz can sweetened condensed milk
1 cup raspberry jam (roughly 3/4 of the jar, if you don't feel like measuring)
1/2 cup chopped, toasted walnuts

Directions

Preheat oven to 350.

1. Mix together graham cracker crumbs and butter. Press into a compact crust in a 9x13 baking dish.


2. Spread coconut evenly over crust.


3. Pour condensed milk evenly over coconut.


4. Bake for 20-25 minutes, or until the edges turn golden.


5. Let cool, then evenly spread jam over everything. (It will seem like there's not enough, but there is.)


6. Chill 3 - 4 hours. Top with toasted walnuts; you may want to use more than 1/2 cup. As you can see in the photos, it's on the sparse side.


7. Cut into squares/ rectangles and serve!


I made these for our Super Bowl party and they were a fucking hit. Not to mention, they were super easy to make. Anything that's easy to throw together and makes me look like I know what I'm doing in the kitchen gets a thumbs up in my book. Five chins all around!


Read More

6.19.2013

Peanut Butter Cookies.

Last month, we celebrated my nephew's birthday. It was a potluck of sorts and I was in charge of the dessert. Since he doesn't like cake, but does like cookies, I went with snickerdoodles and peanut butter.


Unfortunately, I didn't get an "after" shot because I was running late and cookies don't last long enough to even cool off around these parts. I will confess that they came out a little flat for my liking, but that didn't stop partygoers from pigging out. Seriously, I think everyone commented on how good they were. I even tried a cookie myself, you know, just to test the merchandise, and I have to admit, they were gooood. Soft and buttery and not too peanutty. They were a fucking hit.

These cookies are super easy to make and only require a few ingredients. Try it out the next time you have friends over. -Or the next time you feel like secretly binging out on three dozen cookies while your significant other is at the Home Depot.


Read More

5.06.2013

No Dinner, Just Dessert. Thanks.

Last night, Eric and I were trying to decide what to make for dinner. Nothing was really "calling" to either of us and we'd already been to the grocery store earlier in the day, so it wasn't like we didn't have plenty of options to choose from. It was sometime during the dinner discussion when my mouth had a flashback to a peach pie that we bought at Food Truck Night last month. Unfortunately, that particular peach pie store was closed on Sundays and it was at this point that I realized I just wanted pie for dinner.

So we drove back to the grocery store and bought a frozen Claim Jumper Lattice Apple Pie.


If you've never had a Claim Jumper pie, they're the shit. Available in several flavors, I can only attest to the apple and peach.

This giant, deep dish dream come true was just what the doctor ordered. And by "doctor," I mean my chins.

We got home and immediately threw it in the oven.

Instructions:

1. Take the pie out of the plastic wrap and put it in the oven at 425 for 60 minutes.
2. Sprinkle with the brown sugar topping and bake for an additional five minutes.
3. Let it sit for two hours.

As you can see, the second step really gives it a homemade touch.


And the third step is totally optional because we only waited 30 minutes and then ate the shit out of it.

On the back of the box, it states that there are *supposedly* 10 servings. I don't know about all that because, apparently, in our house there are only three servings. Luckily, I didn't get a chance to look at the calories or whatever else it is that you're supposed to look at it before strapping on the feedbag, so we'll just say that the apples contribute to the healthy section of the food pyramid and call it a day.


Mmmm. Go get one tonight.

(I was not compensated in any way for this post, I just really love that pie.)


Read More

12.12.2012

Recipe: Apple Spice Cake with Caramel Sauce.

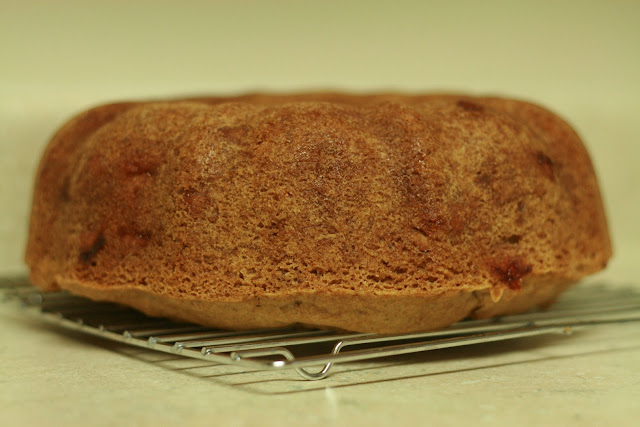
As you may or may not remember, I recently made an apple cake. While the recipe was good, I wanted something a little more cakey and a little less bready. I wanted something with real apple chunks (instead of apple sauce) with an icing that wasn't as heavy as the cream cheese frosting from the previous cake.

I knew if anyone would know their shit when it comes to baking, it would have to be Martha Stewart.

I found this new recipe on Martha Stewart's website and tried it out for Eric's family's Thanksgiving dinner. Unfortunately, I basically ate my weight in French onion dip and Fritos and turkey and stuffing and mashed potatoes and chardonnay, so there wasn't much room for dessert. But being the devoted baker I am, I managed to shove a slice down my throat. And let me tell you, it was gooooood. The caramel glaze REALLY makes this cake a treat.

thingsiliketoeatandothernonsense.blogspot.com


APPLE SPICE CAKE WITH CARAMEL SAUCE
According to MarthaStewart.com

INGREDIENTS
1 1/3 cup vegetable oil
3 cups all-purpose flour
1 tbsp ground cinnamon
1 tsp baking soda
1 tsp salt
2 cups sugar
3 large eggs
4 Granny Smith apples, cored and cut into 1/2 inch pieces
1 cup chopped walnuts or pecans
1 tsp pure vanilla

CARAMEL SAUCE
1 cup light brown
1/2 cup (1 stick) butter
1/4 cup evaporated milk
1 tsp pure vanilla
Pinch of salt


DIRECTIONS FOR CAKE
1. Preheat oven to 350 F (176 C). Spray a bundt pan with cooking spray; set aside.

2. Working over a large sheet of parchment paper, sift together flour, cinnamon, baking soda, and salt. Set aside.

3. In a large bowl, use an electric mixer to combine vegetable oil, sugar, and eggs. Mix on high speed until batter is lemon yellow.

4. Fold parchment paper in half, creating a valley where the sifted ingredients gather. With a mixer on medium speed, slowly add in dry ingredients until just incorporated.

5. Add apples and nuts to batter. Mix till just incorporated. Same for vanilla.

thingsiliketoeatandothernonsense.blogspot.com


6. Pour batter into prepared pan and bake for 75 - 90 minutes, or until toothpick inserted into the the thickest part of the cake comes out dry.


thingsiliketoeatandothernonsense.blogspot.com


7. Remove from oven and cool slightly on a wire rack.


8. Invert cake onto rack; turn cake right-side up to cool completely on rack.

thingsiliketoeatandothernonsense.blogspot.com


9. Serve with drizzled caramel sauce.

thingsiliketoeatandothernonsense.blogspot.com


DIRECTIONS FOR SAUCE
1. Combine ingredients in a small saucepan over medium heat. Cook, stirring, until sauce has reached desired consistency.

thingsiliketoeatandothernonsense.blogspot.com


NOTE:
-The apples and nuts were my favorite parts of the cake. You really can't overdo the apples in this recipe, in my opinion.

-I added more evaporated milk to the caramel sauce than what the recipe called for. I'm guessing it was closer to 1/3 cup. I like the taste of evaporated milk (Ew! Gross!) and I wanted a runnier consistency.

-Keep an eye on the cake as it gets closer to its "done-cooking" time. I made this cake again two days later and left it in the oven a touch too long. It resulted in the apples along the outer edge looking like mini burnt briquettes. Since I didn't want those burnt bits ruining my cake, I just plucked them all out and figured the sauce would hide the holes. In actuality, the sauce did not hide the holes, and instead, my cake had a  Swiss cheese effect to it... with caramel sauce pooling in the potholes.

-The caramel sauce really is the star of this cake. The more sauce you can get on your slice, the better. It has a little more flavor than standard caramel, maybe closer to a thinned out dulce de leche. It was gooood.

thingsiliketoeatandothernonsense.blogspot.com

thingsiliketoeatandothernonsense.blogspot.com


This cake is really easy to make. And it feeds a lot of people. Try it out for your next holiday gathering!

Boner'ppetite!


Read More

© Things I Like to Eat (...and Other Nonsense), AllRightsReserved.

Designed by ScreenWritersArena